Why Upgrade to an SSD?
Traditional hard drives (HDDs) in older Mac Pros are slower and more prone to failure over time. Switching to an SSD brings several advantages:
- Faster boot times – Your Mac Pro can start up in seconds, not minutes.
- Improved performance – Applications like Final Cut Pro, Photoshop, or Logic Pro run much smoothly.
- Better reliability – SSDs have no moving parts, reducing the risk of mechanical failure.
- Extended life – Upgrading storage helps extend the useful life of your 2010 Mac Pro.
For professionals in Dubai’s creative and tech industries, faster workflows mean saving time and working more efficiently.
Is It Possible to Install an SSD?
Yes, it is absolutely possible to install an SSD in a 2010 Mac Pro with an Intel processor. In fact, Apple designed this tower with modular bays, making upgrades easier compared to modern Macs. The system uses SATA II ports by default, which means speeds are limited to 3Gb/s. While this is slower than modern SATA III, the upgrade still provides a big boost over spinning hard drives.
For even better performance, consider using PCIe adapter cards that enable the connection of modern NVMe SSDs. This bypasses the SATA II bottleneck, giving your Mac Pro speeds much closer to those of today’s machines.
How to Install an SSD Boot Drive
Here is a simple step-by-step process to add an SSD as your main boot drive:
- Choose your SSD
- A 2.5-inch SATA SSD is the easiest option. Brands like Samsung 860 EVO or Crucial MX500 are reliable.
- For maximum performance, consider an NVMe SSD with a PCIe adapter.
- Get the right adapter or tray.
- The 2010 Mac Pro drive bays are built for 3.5-inch drives. You will need a 2.5-inch to 3.5-inch adapter bracket for a standard SATA SSD.
- For NVMe SSDs, install a PCIe adapter card in an available slot.
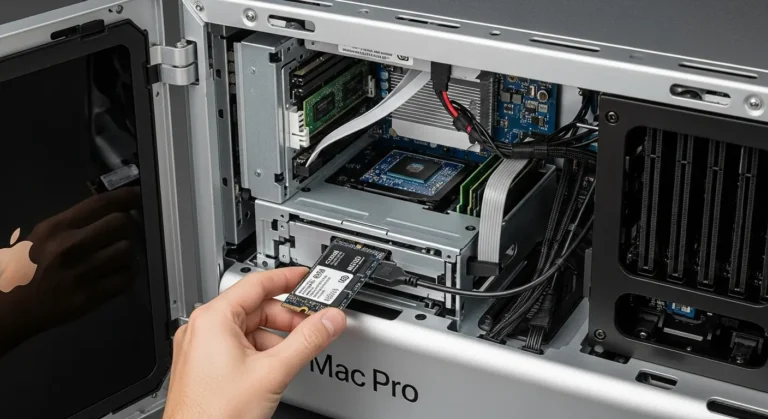
- Install the SSD
- Power down your Mac Pro and open the case.
- Mount the SSD in the tray or adapter, then slide it into an empty bay or PCIe slot.
- Format and install macOS
- Boot your Mac Pro into Recovery Mode or use a macOS installer USB.
- Format the SSD using Disk Utility, then install macOS directly on it.
- Set SSD as the boot drive.
- After installation, go to System Preferences > Startup Disk and choose the SSD as your default boot drive.
Things to Keep in Mind
- macOS compatibility – The 2010 Mac Pro can officially run up to macOS Mojave (10.14). With third-party patchers, you can install newer versions, but performance may vary.
- TRIM support – Ensure that you enable TRIM for your SSD, as this improves both performance and longevity.
- Backups are essential – Always back up your data before replacing drives.
- Power supply and heat – The Mac Pro 2010 features a robust power supply and cooling system, so running an SSD would not cause any issues.
Why Choose Us?
Upgrading older Macs can feel intimidating, but expert guidance ensures everything works smoothly. At Azizi Technologies UAE, we specialize in Mac upgrades and repairs across Dubai. Our team provides:
- Professional SSD installation for older Mac Pros.
- Guidance on choosing the right SSD for performance and budget.
- Data transfer and backup solutions to keep your files safe.
- Reliable service trusted by professionals in Dubai’s tech and creative industries.
With the right support, your 2010 Mac Pro can feel like a new machine again.
Final Thoughts:
Is it possible to install an SSD boot drive on a 2010 Mac Pro with an Intel processor? The answer is a big yes. Whether you choose a standard SATA SSD or upgrade to a high-speed NVMe via PCIe, the performance improvements are worth it. Your Mac Pro will boot faster, run smoother, and handle modern workloads better than you might expect from a decade-old system.
If you are in Dubai and need expert assistance, our team at Azizi Technologies UAE can help with SSD upgrades, data transfer, and professional installation. With our guidance, your Mac Pro 2010 can keep up with today’s demands and continue serving you reliably for years to come.